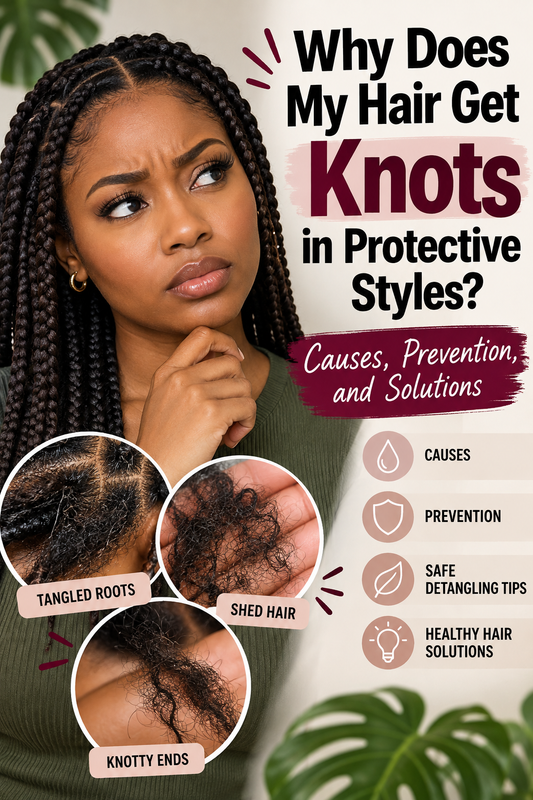
Protective styles are supposed to make caring for natural hair easier. Whether you're wearing box braids, knotless braids, two-strand twists, cornrows, crochet braids, or a wig, the goal is usually the same: reduce daily manipulation, protect your ends, and help your hair retain length.
But what happens when you take down your protective style and discover knots everywhere?
Maybe your roots are tangled together. Perhaps your ends have formed tiny knots, or several sections of hair seem to be stuck together. You might even notice that your hair feels harder to detangle than it did before installing the hairstyle.
This can be frustrating, especially when you've spent weeks trying to protect your natural hair.
So, why does your hair get knots in protective styles?
Hair often develops knots in protective styles because of accumulated shed hair, dryness, natural shrinkage, friction, product buildup, tangled ends, and new growth that becomes intertwined over time.
Protective styles can reduce everyday manipulation, but they don't completely eliminate tangling. Your hair continues to grow, shed, and respond to moisture and friction while it's styled.
The good news is that many of these problems are preventable.
In this complete guide, we'll explain why natural hair gets knots in protective styles, how to prevent tangled roots, how to safely remove knots after braids, and what you can do to protect your hair from unnecessary breakage.
What Causes Hair to Form Knots in Protective Styles?
Hair knots develop when individual strands wrap, twist, or become tightly intertwined with neighboring strands.
Natural hair is particularly susceptible because curly and coily strands naturally bend in different directions.
Unlike straight hair, which generally hangs downward, tightly textured hair may curl back toward itself.
This makes it easier for strands to catch on one another.
When your hair is loose, regular detangling helps remove shed hairs and separate intertwined strands.
However, protective styles often keep your hair secured for several weeks.
During that time, several things can happen:
-
Shed hair remains trapped inside the hairstyle.
-
New growth begins forming around the roots.
-
Natural hair shrinks and wraps around neighboring strands.
-
Moisture levels change.
-
Styling products accumulate.
-
Loose strands rub against extensions or other hairs.
-
Older ends become tangled.
Eventually, these factors can create knots that become noticeable during takedown.
Understanding the causes is the first step toward preventing them.
1. Shed Hair Gets Trapped Inside Protective Styles
One of the biggest reasons hair develops knots in protective styles is accumulated shedding.
Your hair naturally goes through a growth cycle that includes a shedding phase.
Many people shed approximately 50–100 hairs per day, although the amount varies.
When your hair is loose, shed strands can fall away naturally or be removed during washing and detangling.
Protective styles change that process.
For example, when your hair is braided, many shed strands remain caught within the braid instead of falling away.
Over several weeks, those loose hairs accumulate.
By the time you remove your hairstyle, you may have a considerable amount of shed hair trapped among your attached strands.
How Shed Hair Creates Knots
Imagine wearing box braids for six weeks.
During that time, your hair continues shedding naturally.
Some loose strands remain wrapped around your roots or intertwined with the rest of your hair.
When you remove the extensions, those accumulated strands may become tangled around your new growth.
If you immediately run a comb through your hair, the loose strands can tighten into stubborn knots.
How to Prevent Shed Hair Knots
The most important step is careful detangling during takedown.
After removing each braid or twist:
-
Separate the hair gently with your fingers.
-
Identify loose shed strands.
-
Remove shed hair without pulling aggressively.
-
Apply a detangling product if necessary.
-
Work through remaining knots before combining sections.
For a complete breakdown, read our guide on how to detangle hair after braids without breakage.
Taking your time during this process can help preserve the length you've worked hard to retain.
2. New Growth Becomes Tangled at the Roots
Another common reason protective styles cause knots is new growth.
Your hair doesn't stop growing simply because it's braided or twisted.
As new hair emerges from the scalp, the distance between your roots and the installed hairstyle gradually increases.
Over time, the original sections may become less defined.
Neighboring strands can begin wrapping around one another, especially when your natural hair has a tight curl pattern.
Why Root Knots Develop
When your braids are freshly installed, each section is usually neatly separated.
However, several weeks later, the hair near your scalp may become fuzzy.
New growth may begin crossing into neighboring sections.
Shed hairs can also become trapped around the roots.
This combination can produce small knots or compacted tangles.
If the hairstyle remains installed too long, neighboring sections may even begin matting together.
How to Prevent Root Tangling
Pay attention to the condition of your roots throughout the life of your hairstyle.
If neighboring sections are becoming difficult to separate, it may be time to remove the style.
Avoid repeatedly twisting or pulling at your new growth.
When removing the hairstyle, keep each section separate until it has been thoroughly detangled.
For additional information, explore our article on why hair tangles at the roots.
3. Your Natural Hair Becomes Too Dry
Dryness can make protective-style knots more difficult to prevent and remove.
When hair lacks sufficient conditioning and lubrication, strands may experience greater friction.
Instead of sliding past one another easily, individual hairs can catch and snag.
This is particularly noticeable in curly, coily, and tightly textured hair.
Protective styling doesn't automatically keep your hair moisturized.
Your natural hair can still become dry while wearing braids, twists, wigs, or extensions.
Signs Your Hair Is Too Dry
You may notice:
-
Rough or brittle-feeling strands
-
Hair that snaps during manipulation
-
Dry, tangled ends
-
Increased friction when separating sections
-
Hair that feels stiff after removing braids
-
Difficulty detangling without conditioner
Dryness doesn't always mean your hair is severely damaged.
However, consistently dry hair may be more difficult to manage.
How to Keep Hair Moisturized in Protective Styles
A simple moisturizing routine is often more effective than constantly layering products.
Start with a lightweight, water-based moisturizer appropriate for your hairstyle.
Apply enough to refresh your natural hair without saturating it unnecessarily.
For braids, twists, and locs, consider Hairobics All Natural Raaw Roots Locs & Braids Moisturizer Spray.
This moisturizing spray contains purified water and a blend of botanical ingredients and oils, including apricot kernel oil, almond oil, jojoba oil, and castor oil.
It is designed for use with braids, locs, extensions, and natural hair.
A lightweight moisturizing product can help improve softness and manageability, although no product can guarantee that knots or breakage will never occur.
The goal is to maintain flexible, manageable hair without creating excessive buildup.
4. Natural Hair Shrinkage Causes Strands to Intertwine
Shrinkage is a normal characteristic of curly and coily hair.
When natural hair becomes wet or returns to its natural curl pattern, strands may contract toward the scalp.
This can make hair appear significantly shorter than its stretched length.
Shrinkage itself isn't a sign of unhealthy hair.
However, tightly coiled strands may wrap around neighboring hairs as they contract.
Why Shrinkage Matters in Protective Styles
Consider two-strand twists.
When the twists are first installed, the hair may be stretched and neatly separated.
Over time, moisture, humidity, and everyday movement can cause the hair to shrink.
The strands inside each twist may begin wrapping more tightly around one another.
When you eventually unravel the twists, some sections may be difficult to separate.
The same issue can occur with mini twists, braid-outs, and other styles that allow natural hair to contract.
How to Reduce Shrinkage-Related Knots
You don't need to eliminate shrinkage completely.
Instead, focus on keeping your strands organized.
Try installing protective styles on properly detangled hair.
If your hair tangles easily, gently stretching it before styling may help.
Heat-free stretching methods include banding, large twists, and braiding damp hair before allowing it to dry.
Avoid excessive tension when stretching.
Healthy natural hair doesn't need to remain permanently stretched to be manageable.
5. Protective Styles Are Left in Too Long
One of the biggest protective styling mistakes is assuming that longer wear automatically means better protection.
A hairstyle may reduce daily manipulation while it's installed.
However, leaving it in too long can increase the amount of shed hair, buildup, and tangled new growth that accumulates.
Eventually, the disadvantages may outweigh the benefits.
How Long Should You Keep Protective Styles In?
There isn't one perfect timeframe for everyone.
For many people, approximately four to eight weeks may be a reasonable range for certain braided styles, depending on the installation, hair condition, scalp health, and maintenance routine.
Some hairstyles need to be removed sooner.
Mini twists and styles without extensions may require a different schedule.
The important thing is monitoring your hair rather than following a calendar blindly.
Signs Your Protective Style Has Been In Too Long
Watch for:
-
Neighboring roots becoming tangled together
-
Heavy product buildup
-
Excessive matting
-
Significant new growth
-
Persistent scalp discomfort
-
Braids hanging loosely from fragile roots
-
Increased difficulty separating sections
-
Hairline tension or thinning
If you're experiencing these problems, removing the hairstyle may be the healthiest choice.
Learn more in our guide to signs your braids need to be removed immediately.
6. Product Buildup Makes Hair Stick Together
Moisturizers, oils, braiding gels, edge controls, mousses, and styling creams can all serve useful purposes.
However, repeatedly applying products without cleansing can create buildup.
Over time, residue may combine with natural scalp oil, sweat, dead skin cells, lint, and shed hair.
This mixture can accumulate around the base of braids or twists.
How Buildup Contributes to Knots
Imagine applying braiding gel during installation.
Several days later, you add scalp oil.
Then you apply edge control around your hairline.
The following week, you add more moisturizer and styling mousse.
Without adequate cleansing, these layers can accumulate.
The residue may make strands feel sticky or coated.
Loose hairs and lint can become caught in that buildup.
Eventually, the material around your roots may become compacted.
How to Prevent Buildup
Keep your protective-style routine simple.
Avoid applying heavy products every day unless your hair genuinely needs them.
Cleanse your scalp when necessary.
Choose products that work well with your hair and avoid layering several heavy formulas without washing.
For more information, read what causes white buildup around braids and how to remove it.
7. Damaged Ends Form Knots More Easily
Your ends are the oldest part of your hair.
They've experienced more washing, styling, friction, environmental exposure, and manipulation than newer growth.
Over time, the protective outer layer of the hair shaft can become worn.
This may leave the ends feeling rough or prone to snagging.
When damaged ends rub against neighboring strands, they can contribute to tangles.
What Are Single-Strand Knots?
Single-strand knots, sometimes called fairy knots, occur when an individual strand loops around itself and forms a tiny knot.
These are especially common in tightly coiled hair.
You may notice them as small bumps near the ends of your strands.
Although protective styles can help keep ends tucked away, they don't necessarily prevent every single-strand knot.
How to Protect Your Ends
Before installing a protective style, examine your ends.
If they're consistently splitting, snagging, or breaking, a trim may be helpful.
Use conditioner during detangling and avoid aggressively brushing fragile ends.
Choose styles that don't require excessive pulling.
When possible, keep your ends organized and protected from unnecessary friction.
Healthy ends make it easier to retain length over time.
8. Friction From Extensions and Everyday Movement
Protective styles reduce certain types of manipulation, but friction can still occur.
Braiding extensions, clothing, bedding, hats, and repeated movement may create friction against your natural hair.
For example, loose strands around braids may rub against extension fibers.
Twists may rub against collars or scarves.
Hair underneath a wig may experience friction if the wig shifts or the underlying braids are poorly secured.
Repeated rubbing can increase tangling and contribute to breakage.
How to Reduce Friction
Choose protective styles that are comfortable and don't pull excessively.
Secure loose hair gently before sleeping.
Use a satin or silk bonnet, scarf, or smooth pillowcase if it helps reduce nighttime friction.
Avoid rough accessories that catch your strands.
Also pay attention to your extensions.
If the material repeatedly snags your natural hair, consider changing the installation technique or choosing a different style.
How to Remove Knots After Protective Styles Without Breakage
Finding knots after removing braids or twists doesn't automatically mean you need to cut your hair.
Many tangles can be separated with patience, appropriate conditioning, and careful technique.
However, severely compacted mats may require professional assistance.
Here's a gentle approach.
Step 1: Remove the Style in Small Sections
Avoid taking down your entire hairstyle and immediately combining all your loose hair.
Instead, remove a few braids or twists at a time.
Keep the newly released hair separate from sections that haven't been detangled.
This helps prevent loose shed strands from becoming tangled with other areas.
Step 2: Remove Loose Shed Hair
Use your fingers to identify and remove accumulated shed strands.
Don't panic if you notice more shed hair than usual.
When hair has been secured for several weeks, naturally shed strands may have remained trapped.
However, excessive shedding accompanied by visible thinning, bald patches, or scalp symptoms deserves professional evaluation.
Step 3: Apply a Product With Good Slip
A conditioner or detangling product can make strands easier to separate.
Apply it according to the product directions.
Work the product gently through the section.
Allow enough time for the hair to become manageable.
Avoid repeatedly pulling at a knot that isn't loosening.
Step 4: Start With Your Fingers
Finger detangling allows you to feel where individual knots are located.
Carefully separate the outer strands of each tangle.
Work gradually rather than pulling the entire knot apart at once.
If you encounter a compacted area, add more slip as needed and work from the edges inward.
Step 5: Detangle From Ends Toward Roots
Once the larger knots have loosened, use a wide-tooth comb or suitable detangling brush if your hair tolerates it.
Begin near the ends.
Gradually move upward as each section becomes easier to comb.
Hold the hair above the area you're detangling to reduce pulling at the scalp.
Never force a comb through a stubborn knot.
For more guidance, read why hair breaks during detangling and how to prevent it.
Step 6: Cleanse and Condition
After removing accumulated shed hair and separating major tangles, cleanse your hair and scalp.
Use a shampoo appropriate for your hair and scalp condition.
Follow with conditioner.
Pay attention to areas that feel particularly dry or rough.
If your hair has significant damage, a conditioning treatment may improve manageability, but it cannot permanently repair split ends.
Step 7: Keep Detangled Sections Organized
After detangling each section, place it into a loose twist or braid.
This prevents the hair from immediately tangling again while you work on other sections.
Once your entire head is detangled, you can proceed with your normal styling routine.
How to Prevent Knots Before Installing Protective Styles
Preventing knots starts before the hairstyle is installed.
The condition of your natural hair matters just as much as the protective style itself.
Start With Clean Hair
Remove excessive product residue, dirt, and oil before installation.
A clean foundation can help reduce buildup during the life of the style.
Detangle Thoroughly
Don't install braids or twists over existing knots.
Work through each section carefully.
Pay particular attention to the roots and ends.
Condition Your Hair
Conditioning helps improve softness and manageability.
Choose products that work well with your texture, density, and individual hair needs.
Inspect Your Ends
If your ends repeatedly snag, split, or break, consider whether trimming is necessary.
Don't ignore damaged ends simply because they'll be hidden inside extensions.
Avoid Excessive Tension
Protective styles shouldn't cause persistent pain, bumps, or pulling.
Excessive tension can damage hair follicles and contribute to traction alopecia.
Ask your stylist to adjust any section that feels painfully tight.
Choose a Manageable Style
Extremely tiny braids or twists may be difficult to remove, especially if your hair tangles easily.
Choose a size that allows you to maintain your scalp and remove the hairstyle without excessive manipulation.
Which Protective Styles Are Less Likely to Cause Knots?
No hairstyle is completely knot-proof.
However, some styles may be easier to maintain and remove depending on your hair texture and routine.
Medium Two-Strand Twists
Medium-sized twists keep hair organized without requiring extremely small sections.
They're often easier to unravel than very tiny twists.
However, they can still tangle if left installed too long.
Medium Box Braids
Medium box braids can keep sections clearly separated.
Proper installation and timely removal are important.
Avoid excessively heavy extensions.
Loose Flat Twists
Flat twists can provide a low-manipulation option without requiring heavy extension hair.
They may be particularly useful for people who prefer shorter styling intervals.
Cornrows
Cornrows keep hair relatively organized and can work well underneath wigs.
However, the roots still require attention.
Avoid installations that pull tightly at the hairline.
Low-Tension Updos
Simple tucked styles can protect ends while allowing more frequent access to the hair.
They may be useful for people who experience significant matting with long-term extensions.
The best protective style is one that suits your hair and can be maintained comfortably.
Why Does 4C Hair Get Knots in Protective Styles?
4C hair often has a tightly coiled pattern with substantial shrinkage.
These characteristics can make individual strands more likely to wrap around neighboring hairs.
However, 4C hair isn't automatically unhealthy, weak, or damaged.
The issue is often how the strands interact.
When tightly coiled hair is left in a protective style, accumulated shed hair and new growth may become intertwined.
Dryness, damaged ends, and rough detangling can make the problem worse.
Tips for 4C Hair
Focus on keeping your hair properly conditioned before installation.
Use manageable sections.
Avoid excessive tension.
Maintain moisture without heavy buildup.
Remove protective styles before significant matting develops.
Most importantly, be patient during takedown.
Your natural curl pattern doesn't need to be changed to maintain healthy hair.
Should You Wash Your Hair While Wearing Protective Styles?
Yes, many protective styles can be washed.
Your scalp continues producing oil and shedding skin cells while your hair is styled.
Sweat and product residue may also accumulate.
Regular cleansing helps maintain scalp hygiene.
However, washing techniques matter.
Aggressively rubbing braided roots can increase frizz and tangling.
Instead, focus on gently cleansing the scalp.
Use the pads of your fingers rather than scratching with your nails.
Rinse thoroughly and allow your hairstyle to dry completely.
For step-by-step instructions, visit our braids washing guide.
Can Hair Knots Cause Breakage?
Yes.
Knots can contribute to breakage when strands become tightly intertwined and are pulled apart.
The amount of damage depends on the condition of the hair and how the knots are handled.
For example, aggressively combing through a dry knot may cause individual strands to snap.
Repeated breakage can make it difficult to retain length even when your hair continues growing normally.
This is why gentle detangling matters.
Protecting your length isn't only about encouraging healthy growth.
It's also about preserving the strands you already have.
How Often Should You Take Breaks Between Protective Styles?
There isn't one universal schedule.
Some people can comfortably alternate between different low-tension styles.
Others benefit from wearing their hair loose for a period between installations.
The condition of your scalp and hair should guide your decision.
If your hair feels fragile, your edges are thinning, or your scalp remains sore, avoid immediately installing another tight hairstyle.
Give your hair time for gentle cleansing, conditioning, and assessment.
Persistent pain, thinning, or scalp irritation should be evaluated by a dermatologist.
Frequently Asked Questions About Hair Knots in Protective Styles
Why does my hair get knots after taking out braids?
Knots often develop because naturally shed hair remains trapped inside braids while new growth becomes intertwined near the roots. Dryness and product buildup can make detangling more difficult.
Why are my roots matted after protective styles?
Root matting may occur when shed hairs, new growth, and neighboring sections become tangled together. Leaving a style installed too long can increase the risk.
Can protective styles damage natural hair?
Yes, if they're installed too tightly, maintained poorly, or removed aggressively. Properly installed and maintained styles can reduce daily manipulation, but they don't eliminate every source of damage.
Should I detangle my hair before washing after braids?
If your hair contains significant trapped shed hair or visible knots, gently separating those tangles before vigorous shampooing can help prevent further matting. Use adequate slip and avoid pulling through resistant sections.
Why does my hair knot at the ends while braided?
Dryness, split ends, single-strand knots, and friction can contribute. The ends are older and may be more vulnerable to wear.
Does oil prevent knots in protective styles?
Oil may help lubricate strands, depending on the product and application. However, oil alone doesn't hydrate hair or eliminate tangles. Excessive application can also contribute to buildup.
Can I leave knotless braids in for two months?
Some people may tolerate that duration, but it depends on hair condition, installation, and maintenance. Remove the style sooner if you notice matting, excessive tension, significant buildup, or scalp discomfort.
What should I do if my hair is severely matted?
Avoid forceful combing or cutting immediately. A stylist experienced in detangling natural hair may be able to help separate the mats. Some severely matted sections cannot be removed without cutting.
Are mini twists bad for hair that tangles easily?
Not necessarily. Mini twists can reduce manipulation, but very small sections may be more difficult to unravel. If your hair mats easily, larger twists or shorter wear periods may be more manageable.
How can I stop my hair from tangling every time I wear braids?
Start with thoroughly detangled hair, maintain appropriate moisture, minimize product buildup, monitor your roots, remove the hairstyle before matting develops, and detangle carefully during takedown.
Final Thoughts: Why Does My Hair Get Knots in Protective Styles?
If your hair develops knots while wearing protective styles, you're not alone.
Braids, twists, cornrows, wigs, and other protective hairstyles can help reduce daily manipulation, but they don't completely prevent tangling.
Your natural hair continues growing and shedding while it's styled.
Over time, shed strands, new growth, dryness, friction, and product buildup can contribute to stubborn knots.
The most important thing is understanding that protective styling still requires maintenance.
Start with clean, conditioned, properly detangled hair.
Choose comfortable hairstyles that don't create excessive tension.
Keep your scalp clean and your hair manageable.
Avoid leaving protective styles installed beyond what your hair can comfortably tolerate.
And when it's time to remove the hairstyle, take your time.
Healthy hair care isn't about never experiencing a knot. It's about preventing unnecessary tangling, minimizing breakage, and protecting the length you've worked hard to grow.
With the right routine, protective styles can remain a valuable part of your natural hair journey.
For a lightweight moisturizing option designed for braids, locs, and other protective styles, explore the Hairobics All Natural Raaw Roots Locs & Braids Moisturizer Spray and discover a simple way to support softer, more manageable hair between wash days.