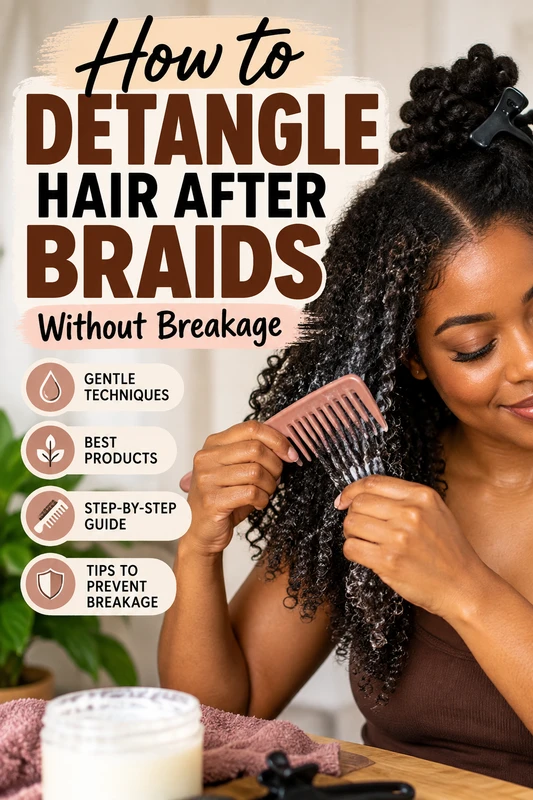
Removing your braids should feel like a fresh start, not a stressful experience filled with tangled roots, excessive shedding, and broken strands. Unfortunately, many women discover that taking down their braids is only half the battle. The real challenge begins when it's time to detangle their natural hair.
Whether you've been wearing knotless braids, box braids, cornrows, or feed-in braids, your hair needs special attention after weeks of being tucked away.
During that time, naturally shed strands can accumulate inside your braids, moisture levels may change, and new growth can become intertwined near your scalp. Without the proper detangling technique, these conditions can lead to unnecessary breakage and difficulty retaining length.
The good news? You don't need to sacrifice inches of healthy hair every time you remove a protective style.
Learning how to detangle hair after braids correctly can help preserve your ends, reduce mechanical damage, remove accumulated shed hair, and prepare your natural hair for its next healthy hairstyle.
In this comprehensive guide, we'll cover everything you need to know about detangling natural hair after braids, including the best techniques for 4C hair, how to loosen matted roots, which products to use, and what to do after detangling.
Why Does Hair Get So Tangled After Taking Out Braids?
Before reaching for your detangling brush, it's important to understand why your hair becomes tangled after wearing braids.
Braids help reduce daily manipulation, but they don't stop your hair from naturally shedding, growing, or experiencing changes in moisture.
Several things happen while your hair remains braided.
1. Naturally Shed Hair Gets Trapped
Your scalp continuously goes through a natural hair growth cycle.
Most people naturally shed approximately 50–100 hairs daily, although individual shedding patterns vary.
When your hair is loose, these strands generally fall away during brushing, washing, or everyday activities.
However, braided hairstyles hold many of those strands in place.
After several weeks, accumulated shed hair can become intertwined with your healthy strands.
When you finally remove your braids, you may notice a surprisingly large amount of loose hair.
This doesn't automatically mean your braids damaged your hair.
Much of what you're seeing may simply be accumulated shedding that couldn't escape while your hair was braided.
2. New Growth Becomes Intertwined
As your hair grows, new strands emerge from the scalp.
These strands may curl, coil, and wrap around neighboring hairs near the braid's base.
This is especially common with tightly coiled natural hair.
If the braids remain installed for an extended period, shed strands and new growth can become increasingly difficult to separate.
3. Product Buildup Accumulates Around the Roots
Throughout your protective hairstyle, you may use moisturizing sprays, scalp oils, gels, edge control, and other styling products.
These products can accumulate around the braid's base.
When combined with natural scalp oils, sweat, and shed hair, the buildup may form a compact area that feels like a small knot.
Attempting to comb directly through this area can cause breakage.
4. Hair May Become Dry
Natural hair still requires moisture while braided.
When strands become dry, they may feel rougher and experience more friction during detangling.
This makes separating intertwined strands more difficult.
For additional guidance on maintaining hydration throughout your protective style, read our complete guide to keeping natural hair moisturized in braids .
What You Need to Detangle Hair After Braids
Having the correct supplies ready before removing your braids can make the entire process easier.
You don't need an expensive collection of products. Instead, focus on moisture, lubrication, gentle tools, and organization.
Your detangling essentials should include:
-
Wide-tooth comb.
-
Detangling brush with flexible teeth.
-
Moisturizing conditioner with good slip.
-
Water spray bottle.
-
Leave-in conditioner or moisturizing spray.
-
Hair clips for sectioning.
-
Satin scrunchies.
-
Microfiber towel.
-
Optional lightweight hair oil.
-
Patience and sufficient time.
Important: Avoid using a fine-tooth comb as your primary detangling tool. Smaller teeth can catch accumulated shed strands and create unnecessary tension.
For extremely tangled hair, your fingers are often your most valuable tool.
How to Detangle Hair After Braids: Step-by-Step
The following routine works particularly well for natural, curly, coily, and textured hair.
The goal is to remove accumulated shed strands while minimizing unnecessary pulling and breakage.
Step 1: Remove Your Braids Carefully
Your detangling routine actually begins before all your braids are removed.
Take down each braid slowly, starting at the bottom and working toward your scalp.
If your hairstyle contains extensions, be extremely careful when cutting them.
Never assume your natural hair ends where the extension appears to change texture.
When uncertain, avoid scissors entirely and unravel the braid manually.
Once the extension is removed, gently separate your natural hair with your fingers.
Avoid immediately combining all the loose sections into one large mass of hair.
This can cause previously separated strands to become tangled again.
Hairobics tip: Work on one braid at a time, removing loose shed hairs as you go.
Step 2: Remove Loose Shed Hair With Your Fingers
Before applying a comb, gently separate the strands using your fingertips.
You may notice loose hairs wrapped around the section, especially near your roots.
Carefully slide these strands away.
Don't pull aggressively if they become caught.
Instead, identify where the strand is tangled and gently loosen the surrounding hairs.
Finger detangling helps you recognize resistance before accidentally forcing a tool through a knot.
If you encounter a particularly stubborn section, leave it temporarily and move to another area.
There's no benefit in rushing.
Step 3: Divide Your Hair Into Manageable Sections
Once you've removed your braids, organize your hair into smaller working sections.
For many women with natural hair, four to eight sections work well.
However, women with extremely thick or dense 4C hair may benefit from creating additional sections.
Secure each section using a loose twist, satin scrunchie, or hair clip.
Working in sections provides several advantages.
It helps prevent freshly detangled hair from becoming tangled again, allows you to distribute products evenly, and makes the entire process easier to manage.
If your hair is particularly dense, work with smaller sections rather than trying to detangle large handfuls simultaneously.
Step 4: Add Moisture and Slip
One of the biggest mistakes people make after removing braids is attempting to comb through dry, tangled hair without adequate lubrication.
Instead, apply a moisturizing conditioner or detangling product that allows strands to slide past one another.
Lightly dampen the section if necessary.
Your hair doesn't need to be soaking wet, but it should have enough moisture and product slip to reduce friction.
Focus on your ends, mid-lengths, and tangled areas near your roots.
Allow the conditioner to sit for several minutes before continuing.
This gives you time to gently work the product throughout the section.
For additional moisture during your hair-care routine, consider incorporating Hairobics Raaw Roots Moisturizer Spray .
Its water-based formula contains botanical ingredients and conditioning oils that help soften and moisturize natural hair, braids, and locs.
For heavily matted hair, pair your moisturizing spray with a rinse-out conditioner specifically designed to provide generous detangling slip.
Step 5: Begin Detangling at the Ends
Never start by placing your comb directly at your scalp and dragging it through your entire hair length.
Doing so can push multiple tangles together, creating larger knots.
Instead, begin with the bottom inch or two of your hair.
Gently separate the ends using your fingers.
Once they feel relatively smooth, move slightly higher.
Continue working upward until you reach your roots.
Hold the section above the area you're detangling to reduce unnecessary pulling on your scalp.
If your comb encounters resistance, stop immediately.
Add additional conditioner, separate the knot with your fingers, and resume only when the strands begin moving freely.
Remember that detangling is not about forcing your hair into submission.
It's about carefully separating individual strands while preserving their integrity.
Step 6: Pay Special Attention to Matted Roots
The root area often requires additional patience after removing braids.
This is where accumulated shed strands, new growth, and product residue frequently become intertwined.
If you notice a compact knot near your scalp, don't immediately attempt to comb through it.
Apply conditioner directly to the affected area.
Gently massage the product into the knot without rubbing the strands together.
Then use your fingertips to separate small groups of hairs from the outside of the tangle.
Continue loosening the section gradually.
For more extensive matting, our guide to detangling matted natural hair without causing breakage explains additional techniques for managing difficult knots.
If a mat is extremely tight, painful, or attached close to your scalp, consider visiting a professional stylist experienced with textured hair.
Step 7: Use a Wide-Tooth Comb
After removing major tangles with your fingers, introduce your wide-tooth comb.
Begin at your ends and gradually work toward your roots.
Avoid using excessive force.
If the comb stops moving smoothly, return to finger detangling.
Some women prefer flexible detangling brushes, while others experience less breakage using a traditional wide-tooth comb.
The ideal tool depends on your hair texture, density, condition, and personal preference.
What matters most is minimizing tension.
Step 8: Twist Each Completed Section
Once a section is thoroughly detangled, place it into a loose two-strand twist or braid.
This simple technique helps prevent freshly separated strands from becoming tangled again.
Continue working through the remaining sections until your entire head is detangled.
At this stage, you should be able to gently run your fingers through each section without encountering major knots.
Your hair doesn't need to be completely straight or stretched.
The goal is simply to remove trapped shed hair and separate tangles safely.
Should You Detangle Hair Before or After Washing Out Braids?
For hair containing accumulated shed strands or matted roots, it's generally better to remove major tangles before shampooing.
Immediately wetting and vigorously washing severely tangled hair can cause loose strands to intertwine further.
A more manageable approach is to remove the braids, finger-detangle, apply a slippery conditioner, and separate the major knots before shampooing.
Once the accumulated shed hair has been removed, you can cleanse your scalp and strands.
Some people prefer completing their final detangling while their hair is wet and saturated with conditioner. This can work well, particularly when there are no remaining mats.
The important distinction is that you should address significant matting before vigorously manipulating your hair during shampooing.
How to Detangle 4C Hair After Braids
Women with 4C hair may experience additional tangling because their tightly coiled strands naturally wrap around one another.
However, this doesn't mean 4C hair must experience excessive breakage during braid removal.
The key is adapting your detangling routine to your texture.
Work With Smaller Sections
Instead of dividing your hair into four large sections, try eight or more manageable sections.
This allows you to focus on smaller groups of strands without creating excessive tension.
Use Enough Conditioner
Dense, tightly coiled hair may require more product to coat each section adequately.
Distribute your conditioner throughout the entire section rather than applying it only to the surface.
Allow Extra Time
Don't expect to detangle several weeks of accumulated shed hair in 15 minutes.
Depending on your length, density, and degree of tangling, the process may require considerably more time.
Avoid Excessive Stretching
You don't need to pull your hair completely straight to detangle it.
Allow your natural curl pattern to remain intact while gently separating intertwined strands.
Keep Completed Sections Organized
After detangling each section, twist it immediately.
This is particularly useful for highly shrinkage-prone hair because loose strands can quickly wrap around one another again.
How to Tell the Difference Between Shedding and Breakage After Braids
Seeing a large amount of hair after removing your braids can be alarming.
However, understanding the difference between normal shedding and breakage can help you evaluate what's happening.
|
Normal shedding |
Hair breakage |
|---|---|
|
Usually involves full-length strands |
Often involves shorter hair fragments |
|
May have a small bulb at one end |
Generally lacks a root bulb |
|
Occurs naturally during the hair cycle |
Results from damage to the hair shaft |
|
Can accumulate while wearing braids |
May result from tension, friction, or weakened strands |
A small bulb is not always visible, so appearance alone cannot provide a definitive diagnosis.
Also, remember that shedding varies from person to person.
If your braids remained installed for six weeks, you're potentially seeing several weeks of accumulated shed hair released during one detangling session.
That can look dramatically different from your normal wash day.
However, persistent thinning, bald patches, scalp inflammation, or unusually heavy shedding deserve evaluation by a dermatologist.
To learn more about preserving your hair after protective styling, explore our article on how to prevent breakage after braids .
What to Do After Detangling Hair From Braids
Successfully removing your tangles is only part of your post-braid hair-care routine.
Your next priority should be cleansing, conditioning, and restoring manageability.
1. Shampoo Your Hair Thoroughly
Once you've removed the major tangles, cleanse your scalp to eliminate accumulated sweat, oil, and styling residue.
Focus on gently massaging your scalp using your fingertips.
Avoid aggressively rubbing the lengths of your hair together.
Allow the shampoo to travel down your strands as you rinse.
If you have substantial buildup, a clarifying shampoo may be appropriate, followed by conditioner.
2. Apply a Deep Conditioner
After weeks of protective styling, your hair may benefit from additional conditioning.
Choose a moisturizing deep conditioner appropriate for your hair type.
Apply it throughout your strands, concentrating on dry areas and ends.
Follow the manufacturer's recommended processing time.
Deep conditioning can improve softness, manageability, and the feel of your hair, making subsequent styling easier.
3. Apply a Leave-In Treatment
Once you've rinsed your conditioner, apply a leave-in treatment to help maintain softness.
Focus on the lengths and ends, which may experience additional friction during styling.
Avoid applying excessive amounts of multiple products simultaneously.
A lightweight, consistent routine is often easier to maintain than layering numerous heavy products.
4. Examine Your Ends
After removing your braids, take time to examine the condition of your ends.
Look for splitting, excessive roughness, and areas that repeatedly catch on neighboring strands.
If your ends are significantly damaged, a professional trim may help prevent additional tangling.
You don't automatically need a major haircut every time you remove your braids.
Trim according to your hair's actual condition.
5. Choose a Low-Manipulation Hairstyle
Immediately reinstalling tight braids may not be appropriate if your scalp feels sore or your hairline shows signs of tension.
Consider wearing loose twists, a twist-out, a wash-and-go, or another comfortable low-manipulation hairstyle.
Our complete guide to caring for hair after taking out braids provides additional recommendations for your post-braid recovery routine.
How to Prevent Hair From Getting Extremely Tangled During Braids
Prevention begins before you remove your protective hairstyle.
Although some accumulated shedding is unavoidable, several habits can make your next detangling session easier.
Keep Your Natural Hair Moisturized
Don't wait until your braids feel extremely dry before moisturizing them.
Regularly assess your hair and apply a lightweight moisturizer when needed.

Hairobics Raaw Roots Moisturizer Spray
Formulated for braids, locs, twists, and natural hair, this moisturizing spray helps maintain softness and manageability while your hair is in a protective style.
For additional tips, explore our article on the best spray for braids and how to use moisturizing sprays effectively .
Don't Keep Braids Installed Indefinitely
The longer you wear braids, the more naturally shed strands can accumulate around your roots.
Many people remove their braids around four to eight weeks, although the appropriate timeframe depends on the hairstyle, installation quality, hair condition, and scalp health.
Remove them sooner if you experience matting, excessive tension, or significant discomfort.
Our guide to how long you should keep braids in explains how to recognize when it's time for a fresh start.
Protect Your Hair at Night
Use a satin bonnet or scarf to minimize unnecessary friction while sleeping.
This helps keep your hairstyle organized and reduces rubbing against bedding.
Avoid Excessive Product Buildup
Applying large quantities of oil, gel, and styling products repeatedly can leave residue around your braid roots.
Use products according to your hair's needs and cleanse your scalp regularly.
Prepare Your Hair Before Installation
Your next braid removal can be easier when your hair is thoroughly detangled before installation.
Start with clean, conditioned hair and remove existing knots before your stylist begins braiding.
Avoid installing braids over tangled or matted sections.
Common Mistakes to Avoid When Detangling Hair After Braids
Even with quality products, incorrect detangling techniques can cause unnecessary damage.
Here are some habits worth avoiding.
Combing directly from the roots: Starting at your scalp can push several smaller knots together into a larger tangle.
Detangling without enough slip: Attempting to force a comb through dry, resistant strands can increase friction and breakage.
Rushing through braid removal: Pulling extensions apart aggressively can damage the natural hair wrapped inside.
Ignoring accumulated shed hair: Leaving loose strands tangled around healthy hair can make your next wash day considerably more difficult.
Using scissors too quickly: Not every knot requires cutting. Try gentle separation first, or seek professional help for severe matting.
Combining all your loose hair immediately: Keep your sections organized to avoid creating new tangles.
Using excessive heat afterward: If your hair already feels fragile, consider avoiding unnecessary heat styling until you've assessed its condition.
Frequently Asked Questions About Detangling Hair After Braids
How long should it take to detangle hair after braids?
There isn't a universal timeframe.
Your hair length, density, curl pattern, and degree of matting all influence the process.
Some people may finish within an hour, while others with dense or heavily tangled hair may need several hours.
Prioritize gentle handling over speed.
Should I detangle my hair wet or dry after braids?
For most people, slightly damp hair with a conditioner that provides good slip is easier to detangle than completely dry hair.
However, begin by removing obvious loose shed strands with your fingers.
If your hair is severely matted, loosen the major knots before thoroughly wetting and shampooing it.
Can I use oil to detangle hair after braids?
Oil can provide lubrication, but it doesn't always offer enough slip to separate stubborn knots.
A moisturizing conditioner or dedicated detangling product is generally more useful for difficult tangles.
You can incorporate a small amount of oil afterward if your hair benefits from it.
Why is my hair so tangled at the roots after braids?
Accumulated shed hair, new growth, product residue, and naturally coiling strands can become intertwined around the base of each braid.
This is particularly common when protective styles remain installed for extended periods.
Is it normal to lose a lot of hair when taking out braids?
Seeing accumulated shed hair is common after removing braids.
However, unusually heavy shedding, visible thinning, bald patches, or persistent scalp irritation should not automatically be dismissed as normal.
A dermatologist can help determine whether an underlying hair or scalp condition is contributing.
Should I deep condition immediately after taking out braids?
Deep conditioning after removing and detangling your braids can be beneficial, particularly when your hair feels dry or difficult to manage.
Cleanse your hair first, then apply an appropriate conditioning treatment.
Can I braid my hair again immediately after detangling?
That depends on your scalp and hair condition.
If your hairline feels tender, your scalp is irritated, or your strands show significant breakage, allow time for recovery before installing another tension-producing hairstyle.
A low-manipulation style may be a more comfortable temporary option.
Final Thoughts: Protect Your Length When Taking Down Braids
Learning how to detangle hair after braids is an important part of maintaining healthy natural hair.
Protective styling can reduce daily manipulation, but your hair still requires proper care before, during, and after installation.
The most important habits are simple: remove your braids patiently, separate accumulated shed hair, apply sufficient detangling slip, work from your ends toward your roots, and keep your hair organized in manageable sections.
Most importantly, never force your way through a stubborn knot.
With consistent moisturizing, gentle detangling, and an appropriate post-braid routine, you can reduce unnecessary breakage and retain more of the length you've worked hard to grow.
Healthy hair doesn't end when your braids come down. Your takedown routine is part of your protective styling routine.
Explore more natural hair care tips and products at Hairobics All Natural .