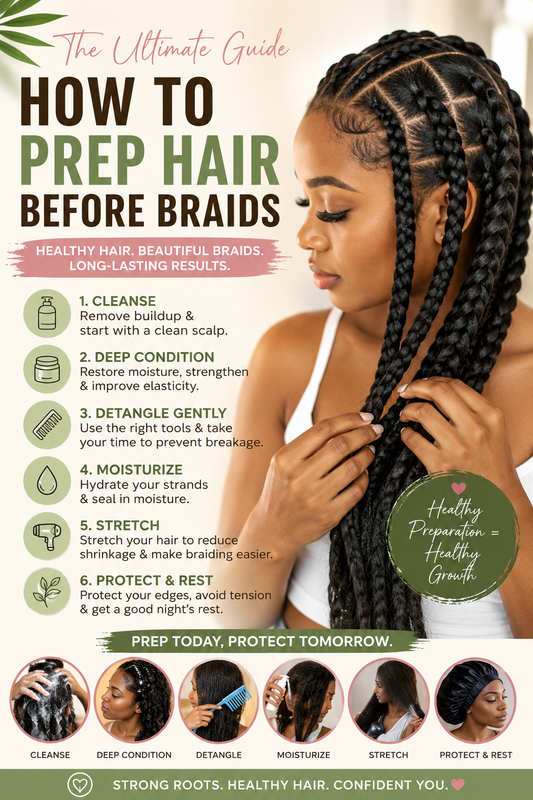
Braids are one of the best protective hairstyles for promoting length retention, reducing daily manipulation, and giving your hair a stylish break. Whether you're getting box braids, knotless braids, cornrows, Fulani braids, passion twists, or crochet styles, the health of your hair underneath determines how successful your protective style will be.
Unfortunately, many people focus only on the installation day and forget that healthy braids begin several days before your appointment.
Proper preparation can mean the difference between:
- Healthy hair growth
- Dry, brittle strands
- Comfortable scalp
- Itchy braids
- Fuller edges
- Hair breakage
- Long-lasting braids
- Premature frizz
If your hair isn't properly cleansed, moisturized, and strengthened beforehand, wearing braids can actually make existing problems worse.
This complete guide explains exactly how to prepare your hair before getting braids so your scalp stays healthy and your hair remains strong throughout your protective style.
Why Preparing Your Hair Matters
Think of braids like putting your hair into storage.
Whatever condition your hair is in before installation is the condition it will stay in for several weeks.
If your hair is:
- Dry
- Dirty
- Weak
- Tangled
- Damaged
- Protein deficient
Those problems don't magically disappear once your braids are installed.
Instead, they often become worse because your hair is tucked away.
Proper preparation helps:
- Reduce breakage
- Prevent scalp irritation
- Lock in moisture
- Minimize shedding
- Protect edges
- Encourage healthier growth
- Improve braid longevity
Start Preparing 3–7 Days Before Your Appointment
Avoid waiting until the morning of your braid appointment.
Instead, begin preparing your hair several days beforehand.
This gives your hair time to:
- Recover from washing
- Absorb moisture
- Strengthen
- Stretch naturally
- Reduce stress
A few days of preparation often results in smoother installations.
Step 1: Remove Product Buildup
One of the biggest mistakes is installing braids over dirty hair.
Hair products accumulate over time:
- Oils
- Butters
- Styling creams
- Leave-ins
- Edge control
- Sweat
- Dust
- Pollution
All of this buildup sits directly on your scalp.
Once braids are installed, that buildup becomes trapped.
Signs You Need a Clarifying Wash
Your hair may need clarifying if:
- Products stop absorbing
- Hair feels waxy
- Scalp feels itchy
- Hair feels heavy
- White flakes appear
- Hair looks dull
Clarifying removes residue and gives your scalp a fresh start.
Step 2: Wash Your Hair Thoroughly
Never skip shampoo.
Healthy braids begin with a clean scalp.
Massage shampoo into:
- Hairline
- Crown
- Nape
- Behind ears
Use your fingertips—not your nails—to gently cleanse.
Don't rush.
A clean scalp reduces:
- Itching
- Odor
- Product buildup
- Inflammation
Shampoo Twice If Necessary
If you've worn:
- Wigs
- Gel styles
- Heavy oils
- Previous braids
A second shampoo often removes leftover residue.
Hair should feel:
- Clean
- Soft
- Fresh
—not squeaky dry.
Step 3: Deep Condition
This may be the most important preparation step.
Braids reduce daily moisturizing opportunities.
That means your hair needs moisture before installation.
A deep conditioner helps:
- Restore hydration
- Improve elasticity
- Reduce breakage
- Increase softness
- Strengthen strands
Leave the conditioner on according to directions.
Heat can improve penetration.
Focus on Hair Ends
Hair ends are the oldest part of your hair.
They're usually:
- Driest
- Weakest
- Most fragile
Spend extra time conditioning your ends.
Healthy ends retain more length over time.
Step 4: Detangle Carefully
Never arrive with tangled hair.
Detangling beforehand saves:
- Time
- Pain
- Breakage
Work in sections.
Start from:
Hair ends
↓
Mid-length
↓
Roots
Never rip through knots.
Best Detangling Tools
Many people successfully use:
- Wide-tooth comb
- Detangling brush
- Fingers
- Sectioning clips
Finger detangling first often minimizes breakage.
Step 5: Trim Damaged Ends
Braids cannot repair split ends.
If your ends are:
- Thin
- Ragged
- Splitting
- Tangling
Consider a light trim.
Healthy ends:
- Braid better
- Shed less
- Retain length longer
Step 6: Moisturize Properly
Hydrated hair bends without snapping.
Apply moisture while hair is still slightly damp.
Good moisture routines include:
Leave-in conditioner
↓
Light cream (optional)
↓
Lightweight sealing oil
Avoid making your hair greasy.
Excess oil attracts dirt.
Don't Saturate Your Hair
Many people think more oil equals healthier hair.
Actually:
Too much oil can:
- Cause buildup
- Weigh hair down
- Attract dust
- Make braiding slippery
A light layer is enough.
Step 7: Stretch Your Hair
Stretching reduces:
- Tangles
- Shrinkage
- Installation time
Popular methods include:
- Banding
- Blow drying on cool or low heat
- African threading
- Large twists
- Large braids
Avoid excessive heat.
Should You Blow Dry?
It depends.
If your stylist requests stretched hair, a gentle blow dry can help.
Always use:
- Heat protectant
- Low heat
- Low tension
Your hair doesn't need to be bone straight.
Just manageable.
Step 8: Strengthen Weak Hair
If your hair breaks easily, strengthen it before braids.
Healthy strands tolerate manipulation better.
Signs you may benefit from strengthening include:
- Excessive shedding
- Stretchy hair
- Mushy texture
- Constant breakage
Don't overdo protein treatments.
Balance protein with moisture.
Step 9: Massage Your Scalp
Healthy circulation supports healthy hair.
Spend a few minutes gently massaging your scalp.
Benefits include:
- Relaxation
- Better product distribution
- Reduced tension
- Improved scalp comfort
Avoid aggressive scratching.
Step 10: Protect Your Edges
Edges are especially vulnerable.
Before braids:
- Avoid tight ponytails
- Don't glue wigs repeatedly
- Skip excessive edge control
- Moisturize your hairline
Healthy edges survive protective styles much better.
Don't Scratch Your Scalp
If your scalp is itchy before braids, identify why.
Possible causes:
- Dryness
- Product buildup
- Dandruff
- Allergies
Scratching creates tiny wounds.
Installing braids over irritated skin can increase discomfort.
Eat and Hydrate Before Your Appointment
Healthy hair starts inside the body.
Drink plenty of water.
Eat foods rich in:
- Protein
- Iron
- Zinc
- Vitamin C
- Omega-3 fats
Healthy nutrition supports stronger strands.
Sleep Well the Night Before
Braiding appointments often last several hours.
Being rested helps you:
- Sit comfortably
- Stay relaxed
- Reduce scalp sensitivity
Stress can also contribute to increased shedding.
Communicate With Your Stylist
Tell your stylist if you have:
- Tender scalp
- Thin edges
- Hair loss
- Scalp conditions
- Allergies
Good stylists adjust tension accordingly.
Never suffer through painful braids.
Avoid These Common Mistakes
1. Arriving With Dirty Hair
Dirty hair traps bacteria and buildup.
2. Using Heavy Grease
Too much grease makes installation harder.
3. Skipping Conditioner
Dry hair breaks easier.
4. Ignoring Split Ends
Split ends continue splitting inside braids.
5. Tight Hairstyles Before Braids
Avoid stressing your edges.
6. Excessive Heat
Protective styles shouldn't begin with heat damage.
7. Braiding Wet Hair
Hair should be dry before installation.
Wet hair trapped inside braids can encourage mildew and unpleasant odors.
Best Routine the Week Before Braids
Seven Days Before
- Clarify hair if needed
- Deep condition
- Moisturize
Three Days Before
- Stretch hair
- Protect ends
- Reduce manipulation
One Day Before
- Lightly moisturize
- Sleep in a satin bonnet
Appointment Day
- Hair clean
- Hair dry
- Hair detangled
- Hair stretched
- Edges moisturized
Caring for Your Hair After Installation
Preparation doesn't end once braids are installed.
Continue to:
- Moisturize your scalp regularly
- Cleanse when necessary
- Sleep with a satin bonnet or scarf
- Avoid excessive tension
- Keep braids from becoming overly dry
Healthy maintenance helps you get the most from your protective style while minimizing damage.
Frequently Asked Questions
Should I oil my hair before braids?
A light amount is fine, but avoid saturating your hair with heavy oils. Excess oil can attract dirt and make installation more difficult.
Should I wash my hair the day before braids?
Yes. Clean, dry hair is ideal for most braid installations. Follow washing with deep conditioning and proper moisturizing.
Is it okay to braid dirty hair?
No. Installing braids over dirty hair can trap buildup, contribute to itching, and create an unhealthy scalp environment.
Should I trim my hair before braids?
If your ends are split or damaged, a light trim can improve the overall health and appearance of your braids.
How long should I wait after washing before braiding?
Most stylists recommend braiding on completely dry hair. Washing the day before your appointment often works well, allowing enough time for your hair to dry and remain moisturized.
Final Thoughts
Proper preparation is the foundation of a successful protective style. Washing away buildup, deep conditioning, detangling thoroughly, moisturizing effectively, and stretching your hair before your appointment all help reduce breakage, improve comfort, and support healthier hair growth.
Taking a little extra time before installation can make your braids last longer, keep your scalp healthier, and protect your strands while they're tucked away.
Whether you're getting knotless braids, box braids, cornrows, or another braided style, starting with clean, hydrated, and well-prepared hair gives you the best chance of maintaining strong, beautiful natural hair throughout your protective style.